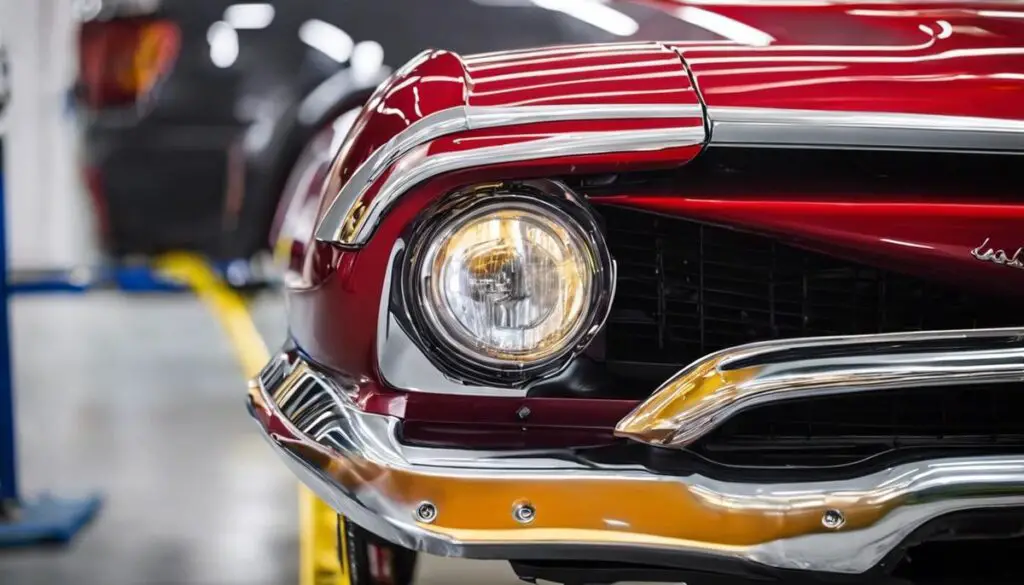
Many of us take pride in maintaining our vehicles in pristine condition; from the gleaming engine to the sleek exterior. Yet, one of the components that often gets overlooked is the chrome bumper. Whether it’s to mask existing damage or simply to give your vehicle a fresh new look, painting chrome bumpers is a task that requires knowledge, patience, and the right approach. This article will walk you through the process, beginning with the crucial preparation phase. You’ll understand the importance of properly cleaning and sanding your bumper to ensure a smooth, even application of paint. It will also guide you in choosing the appropriate tools and paints to achieve the desired finish.
Preparation of Chrome for Painting
A Step-By-Step Guide To Preparing Chrome For Painting
Introduction
Chrome is a popular metal that gives an elegant and sophisticated touch to any object. Still, many hobbyists passionate about refurbishing or enhancing chrome surface objects find themselves at a crossroad, pondering how best to go forward. The challenge? Making the chrome surface receptive to the paint. The solution? A thorough and competent preparation process. Let’s take a peek into the captivating world of chrome painting preparations together!
- Procure Materials
Getting started, first things first: Let’s gather the tools needed. Quality is vital. Isn’t it always more exciting when we’re not just doing something, but doing it right? For this activity, these are the essentials:
- Trisodium Phosphate (TSP)
- Sandpaper (220-grit)
- Self-etching primer
- Acetone
- Clean cloth
- Rubber gloves
- Suit Up!
It’s not an Avengers call, but our little adventure could have its hazardous bits. Remember, safety first. So, always wear rubber gloves when handling chemicals like TSP or acetone.
- Cleanse Thoroughly With TSP
Trisodium Phosphate (TSP) serves as the perfect cleaner for chrome surfaces before they meet their paint. A hearty mix of one cup of TSP in one gallon of warm water should suffice. Dip a clean cloth into this solution and scrub the chrome surface diligently. It’s essential to get rid of grease, grime, or any remnants of old wax. A sparkling clean surface is a canvas to play with!
- Sand it Down
After the chrome surface is dry, it’s time to form a bond, quite literally. Using 220-grit sandpaper, gently sand the entire surface. This process, called abrasion, gives the surface texture, promoting adhesion for the incoming paint. Be patient with this step. Though the chrome might look scuffed, that just means we’re doing it right.
- Acetone Wipe Down
Post-sanding, you may find a dusty residue clinging to your chrome surface. No worries! That’s when acetone, the cleaning wonder, comes into play. Simply dampen a clean cloth with acetone and wipe down the entire chrome surface. Acetone also acts as a degreaser, further preparing the surface for a smooth coat of paint.
- Primer Application
It’s time to bring out the self-etching primer. This is what provides the necessary grip for the paint to adhere. Ensuring an even application is essential for peak aesthetics and durability. Apply light coats, giving each layer ample time to dry before applying the next.
Final Stage: Ready For Paint
At last, after our deliberate, step-by-step preparation, the chrome surface is ready for its transformation! Eager, isn’t it? Ready to embrace glorious colors or sophisticated hues? Remember, the magic lies as much in the artistic journey as it does in the final result. Now, armed with knowledge, enthusiasm, and a well-prepared canvas, the chromatic symphony awaits! Without further ado, let’s embark on crafting a masterpiece!

Selection of Right Tools and Materials
At this stage, you’ve most likely eaten through a couple of sandpaper sheets and your bumper is gleaming with a pristine primed surface, craving the finesse of a vibrant topcoat. But what paints and materials should you reach for to achieve that show-stopping, head-turning finish? In our shared quest for chrome bumper brilliance, let’s dive deep into all things paint – from the exquisite selection of materials to impactful application techniques!
First and foremost, let’s shower our attention on the linchpin of our operation, the paint! Unequivocally, the best choice would be automotive paint: a formulation that’s designed specifically to withstand the rigors of weather, road grime, and relentless sunlight. Yep, this is not the time to pinch pennies or get side-tracked by attractive bargains at your local hardware store. Automotive paint, typically acrylic urethane or enamel, offers a durable, smooth, and glossy finish that’s a perfect adversary for the rough and tough on-road situations.
Coming to the color selection, this largely hinges on individual tastes and the overall aesthetics of your vehicle. However, for chrome bumpers, classic colors like black, silver, or matching the color with your car’s body often gives a sleek, seamless appearance.
Next up, it’s essential to go over the pivotal “how-to” of paint application. A spray gun will be your best ally here. The uniform and seamless coverage that a high-volume, low-pressure (HVLP) spray gun provides is unparalleled. Not to mention, it’s a satisfyingly fun experience to wave the magic wand-like spray gun over your chrome treasure!
While we’re on the subject of spray guns, let’s discuss compressor units. This often-overshadowed element ensures you can regulate the air pressure to be optimum for your painting need. Aim for a stable PSI within 25-30 – your paint job will thank you!
Lastly, onto the delightful “cherry-on-top” stage – Clear Coat. A high-quality automotive clear coat will not only provide an additional layer of protection against the elements but also amplify the lustrous gloss of your fresh paint job. It’s like an insurance policy for that gorgeous, newly-painted bumper!
Always remember, painting chrome bumpers is not an out-of-the-box, one-size-fits-all process. It requires patience, practice, and an artistic endowment. But that first ride with your mirror-like, flawlessly painted bumper reflecting the envy of passers-by makes the painstaking process worth every single effort!
So, gear up, fellow chrome-enthusiasts! Your journey from a bland, muted chrome piece to a radiant, attention-grabbing bumper begins now! Paint that chrome pride like the automotive artist you are. Remember: there lies an incredible sense of accomplishment at the end of this chromatic adventure – a spectacle of a bumper that you’ll have transformed with nothing but your sheer will and artistic prowess!
Painting and Finishing Process
Having reached the zenith of preparation, it’s time to dive into the artistry of painting your chrome bumper. Always remember, the aim is to transform an otherwise unremarkable chrome surface into a unique work of art that not only protects but adds dimension and character to your vehicle.
Now, you might be wondering, “What type of paint should I use?” For a professional, long-lasting paint job, the answer is clear – automotive paint. Why so? Automotive paint is designed specifically for vehicles, and it safeguards your newly primed chrome bumper from the environmental elements. It also provides the bumper with a high-quality finish, creating a look of depth and dazzle that can’t be beaten.
As for color selection, it’s largely a matter of aesthetics and personal preference. Yet, some colors step up the wow factor for chrome bumpers. Classic blacks and whites are always in trend, while metallic shades like silver, crimson red, and cobalt blue add a certain allure. Vintage lovers often sway towards pastel hues to create a retro look.
The application of paint matters too. An HVLP (High Volume Low Pressure) spray gun is recommended for a beautiful, even finish. Its consistent spray pattern ensures there’s no accumulation of paint in one area and aids in preventing runs. Couple this with a reliable compressor unit to regulate the air pressure, and you’re on your way to painting like a pro.
After the paint comes the all-important clear coat. The clear coat acts like a sealant for the paint, protecting it from damage caused by UV rays, weather, and even minor scratches. Choose a high-quality automotive clear coat for unmatched shine and durability.
But here comes the real challenge: the act of painting itself. It calls for patience, lots of practice, and a dabbling in artistic skill. Apply the paint in thin, even coats. Take your time and do several passes if need be. But don’t let this daunt you. Remember, even the greatest were beginners once. With each coat, you’ll become better, more confident, and fluent.
And finally, stand back and admire your handiwork. There’s nothing quite like the satisfaction that comes from having transformed a plain chrome bumper into a marvel that adds charm not just to your car, but also to your identity. This sense of accomplishment is truly unparalleled. You’ve not only acquired a new skill but have also added a personal touch to your vehicle.
Now that you’re equipped with the knowledge of how to ensure a professional, long-lasting paint job on a chrome bumper, don’t be afraid to get your hands dirty. The journey is as thrilling as the destination. So go on, embrace the challenge, and transform that chrome bumper into your personalized canvas!

The process of painting chrome bumpers may appear daunting at first, especially if you’re new to the world of DIY vehicle maintenance. However, as is true with any task, following a diligently mapped out plan and adhering to the right methods will yield satisfying results. By ensuring that your chrome is well-prepared, using the right tools, and carefully implementing the painting process, you too can breathe new life into your chrome bumpers. And remember, the key to creating a lasting finish lies not just in the painting process, but also in the required post-paint care and maintenance. So, why not give it a try? You might surprise yourself with the level of craftsmanship you possess!

Tomas is a retired Chevy Auto Technician that brings decades of hands-on experience and expertise to the table. He’s also a father to two incredible daughters. He enjoys using his knowledge and experience to help you solve and find reliable information on Chevrolet vehicles. Whether it’s troubleshooting engine problems or providing tips for maintenance, Thomas is committed to helping Chevy owners keep their vehicles running smoothly and safely.

