Safe and efficient operation of any vehicle largely depends on a well-functioning brake system. A significant component of this critical safety feature is the Master Cylinder, the heart that pumps life – in the form of brake fluid – into the brake lines. Mastering the identification of the Master Cylinder ports and understanding their connection to the rest of the braking system demystifies how the braking power is administered from your foot to the wheels of your vehicle. This knowledge equips you with a basis for recognizing potential issues and executing crucial maintenance to keep your vehicle running smoothly and, above all, safely.
Identifying Master Cylinder ports
Demystifying The Ports on Master Cylinders – A Simplified Approach
When it comes to the fascinating world of automotive technology, one of the more complex and intriguing components is the master cylinder. Of crucial importance in a brake’s hydraulic system, it’s essential for any technology enthusiast to comprehend the distinction between the various ports on a master cylinder.
Master cylinders come typically with two or four ports which are essentially outlets for brake fluid. Discerning between them can seem complicated. However, understanding the function and characteristics of these ports can make it a straightforward process. Here’s a how-to guide simplifying this differentiation.
Step 1: Identify The Number of Ports
First things first: take note of the number of ports. Two-port master cylinders have been standard on many models up until the late 1960s, while the four-port design has become prevalent from the 1970s onwards, as both front and rear brake systems started utilizing disc brakes.
Step 2: Understand The Function
In the two-port master cylinders, one port usually leads to the front brakes, while the other directs to the rear brakes. If you’re dealing with a four-port variant, two ports are assigned for each braking system; one for the front brakes and another for the rear brakes. This redundancy allows for a safety feature—if one part of the braking system fails, the other continues to operate independently.
Step 3: Spot The Proportional Bias
Four-port master cylinders also come with a built-in feature known as ‘proportional bias.’ These include two ports grouped closer together, typically assigned for the front brakes. On the contrary, the two which are further apart are used for the rear brakes. This differential is termed as ‘proportional bias’ and helps maintain stable braking without the rear brakes locking up.
Step 4: Look for the Residual Pressure Valve
Residual check valves can be found in most drum-brake master cylinders. These are often distinguishable by inspection plugs on the side of the unit. These valves maintain a slight pressure in the brake system at all times, which is crucial for preventing air from being drawn into the system.
Step 5: Companion The Cylinder
Now that ports and pressure valves have been correctly identified, it’s time to link up the master cylinder with the appropriate braking system. Always remember to connect the right port with the corresponding braking system, keeping proportional bias in mind. This step is crucial so as to avoid any brake imbalance issues, enhancing safety.
Mastering the art of identifying the ports on a master cylinder may seem like a daunting task initially, but with a systematic approach, it doesn’t need to be. This in-depth understanding not only quenches the technology enthusiast’s inherent curiosity but also allows for optimal usage, maintenance, and higher overall control of your automotive engagements. Embrace technology, embrace automation, embrace innovation. Stay tuned for more tech insights in the future.
Understanding Master Cylinder design
Designing a masterpiece: The magnificent mechanism of a Master Cylinder
In the world of automotive technology, a car’s braking system is absolutely essential, with the Master Cylinder standing as one of the most crucial components. Designing the system to operate seamlessly and effectively is critical in ensuring not just the vehicle’s performance, but also the safety of passengers. While we have explored several key elements of the Master Cylinder, including its ports, their roles, and the proportional bias found in four-port designs, we have yet to scratch the surface on the overall design of a Master Cylinder.
The Master Cylinder is specifically engineered to convert non-hydraulic pressure, like foot force, into hydraulic pressure to enable smooth braking. At its core, the Master Cylinder incorporates a cylindrical housing, which hosts a series of pistons, seals, and springs. The complex interplay of these components are the lifeblood of your vehicle’s braking mechanism.
Initially, when the brake pedal is pressed, the primary piston is displaced from its resting position. This creates a pressure differential that then propels the secondary piston. It’s an intriguing design that ensures the primary piston bears the brunt of the initial workload. The secondary piston comes into play only when heavier braking is required, providing a balanced and effective system response regardless of the force applied to the pedal.
One of the most innovative aspects of the Master Cylinder’s design lies within the compensating ports. These open into the fluid reservoir when the brake pedal is not pressed. When the brakes are applied, these ports close and fluid is then pushed down the brake lines. This fluid displacement is what ultimately causes your vehicle to stop.
The mechanism’s efficiency largely depends on the precise fit of every component, all of which are contained within a relatively small volume of space. A poorly designed or improperly maintained Master Cylinder can result in compromised performance or a critical failure of the braking system. Therefore, regular inspections are crucial, and any detected issue should be promptly addressed.
Let’s cast a light on how materials and construction influence the design and performance of Master Cylinders. Materials chosen must withstand extreme pressure, heat, and friction. Therefore, high-quality metals such as aluminum and cast iron are usually used. They also prove to be durable and resistant to corrosion. Such characteristics are vital in ensuring that the Master Cylinder lasts as long as the vehicle itself.
Ultimately, the concise layout, meticulous material use, and innovative engineering of Master Cylinder designs directly influence the overall performance, efficiency, and safety of an automobile’s braking system. As technology continues to progress, auto engineers are relentlessly pushing the envelope to mold this design into a more advanced, responsive, and effective mechanism. The potential application of novel materials and cutting-edge technology, from lightweight composites to intelligent sensors, is an invigorating prospect. The future of Master Cylinder design holds immense potential as we harness technology to make our vehicles safer, smoother, and more resilient than ever.
How to connect ports to the braking system
Now that we’ve covered internals, let’s talk about the physical connection process, which is the practical application of our knowledge so far.
First, ensure you have the necessary tools:
- A sturdy wrench
- new brake lines if the old ones are damaged
- compatible brake fluid
- an empty container for the old fluid
- a ton of rags
- and most importantly, a helper to bleed the brakes and catch the waste
If you plan on doing this more than once, investing in a quality flare wrench and line cutter may save you from a world of frustration.
Before you begin, remove the old master cylinder and lines, ensuring that all the fluid is properly drained into your container. If you happen to spill any, remember to clean it up immediately – brake fluid is extremely corrosive and can eat through paint in no time.
Now, let’s dive into the connection and installation process.
Start with mounting the new master cylinder. It is typically bolted to the brake booster or, in non-power brake systems, directly to the firewall. Make sure it is fastened securely to avoid any possible movement when applied. You can then begin reconnecting the brake lines. Remember, the two lines going from the master cylinder will lead to the front and rear brakes, respectively.
Once securely fastened, it’s time to refill the master cylinder reservoir with brake fluid. See this as an opportunity to completely change and upgrade your fluid – you’d be surprised how much of an impact this can have on braking performance.
Before you start the car, and in turn, the brake booster, manually bleed the master cylinder. You can do this by pushing in the plunger (either with a special tool or a helper’s foot on the brake pedal) many times until you see fresh fluid run out of the brake lines. Repeat the process for all four lines – first those closer to the master cylinder, then the further ones.
Please note, this process may vary slightly depending on your specific vehicle model, but the core steps should be fairly universal. You’ll also need to properly bleed your brakes after this. That will include each wheel cylinder or caliper, following the factory prescribed order.
The challenge lies in the actual process, in the wrenching and bleeding, in the laying down and groaning, not in the theory. Don’t rush, take your time, and arm yourself with patience. This kind of job is rarely “fun” for most people, but the reward is in the result: a superior brake feel, lost in most older and well-used cars.
Also, remember to dispose of your old brake fluid properly. Most auto parts stores will take it for free, as they have the means to recycle it.
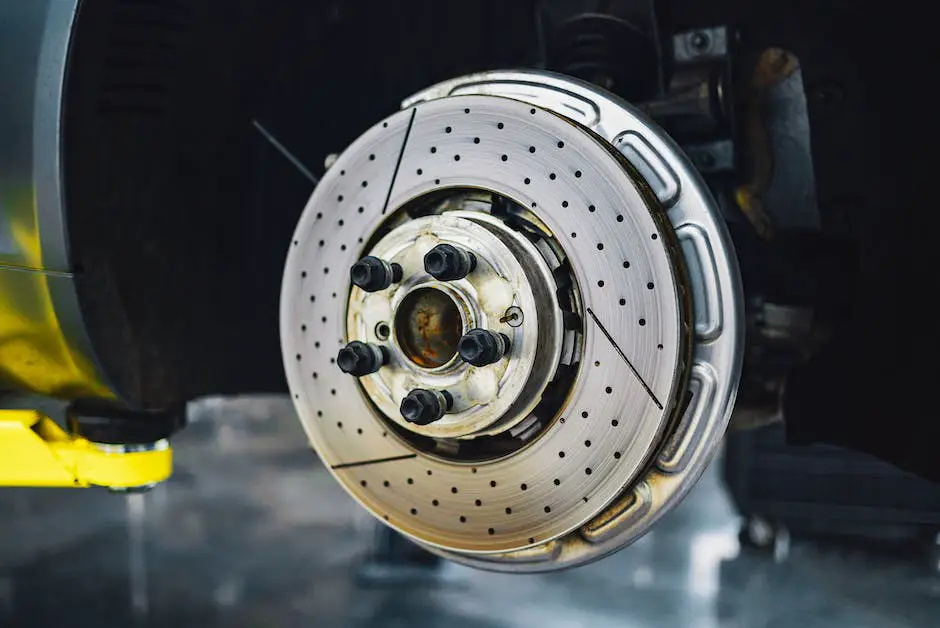
Understanding and applying the intricacies of a Master Cylinder’s function and design can boost your confidence in dealing with your vehicle’s brake system. Identifying the correct master cylinder ports is instrumental in the maintenance or replacement process. Armed with knowledge about how these ports connect to either the front or the rear of your braking system, you can ensure a successful connection for optimal brake performance. Remember, a well-maintained braking system spells the difference between a safe ride and a potential disaster. Let’s empower ourselves with knowledge about the mechanics of our vehicles for a safer and more informed driving experience.

Tomas is a retired Chevy Auto Technician that brings decades of hands-on experience and expertise to the table. He’s also a father to two incredible daughters. He enjoys using his knowledge and experience to help you solve and find reliable information on Chevrolet vehicles. Whether it’s troubleshooting engine problems or providing tips for maintenance, Thomas is committed to helping Chevy owners keep their vehicles running smoothly and safely.

